In today's corporate environment, time efficiency is crucial. And one way to save time in data analysis is by using saved views.
These saved views allow you to quickly switch between different table views that you use most frequently.
Not only that, but these saved views are visible across all admin accounts, ensuring consistency in data analysis.
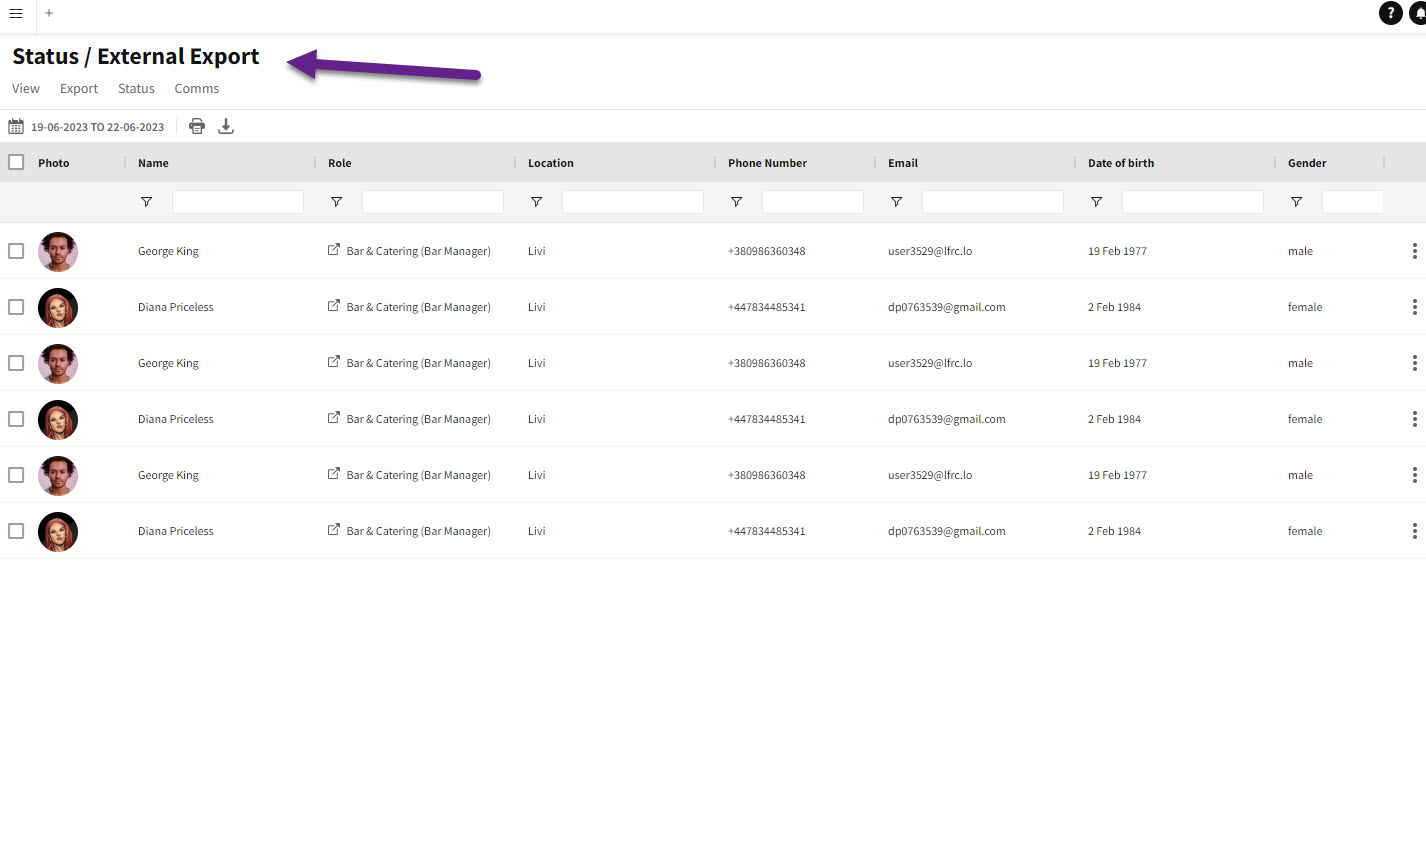
Status Page
Let's take the example of the Status page. Here, an admin might have one saved view that focuses on data regarding crew confirming attendance and check-ins.

And another saved view that contains data required to be shared with a third party. These saved views make it easy to switch between different data views based on specific needs.
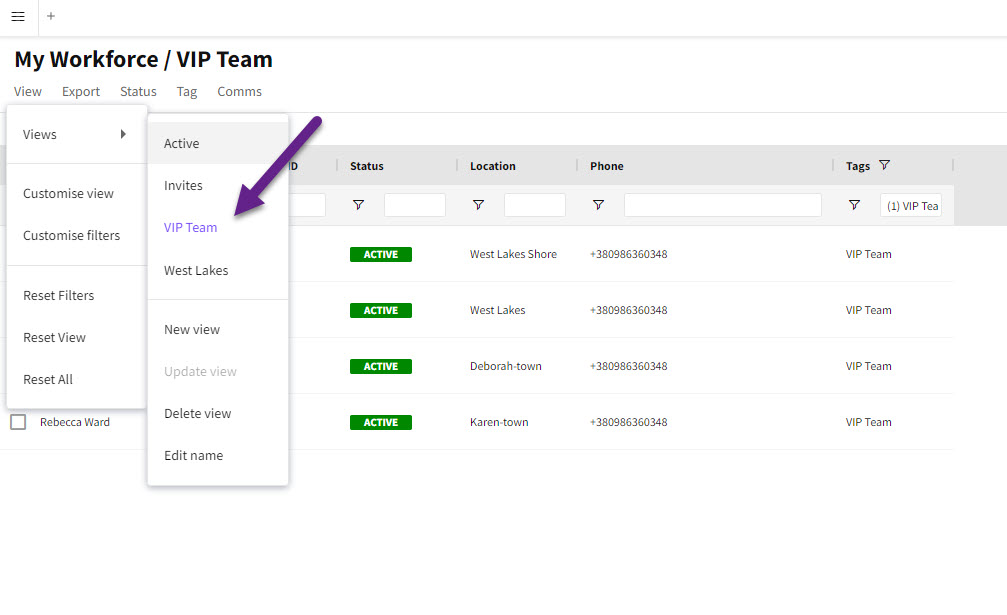
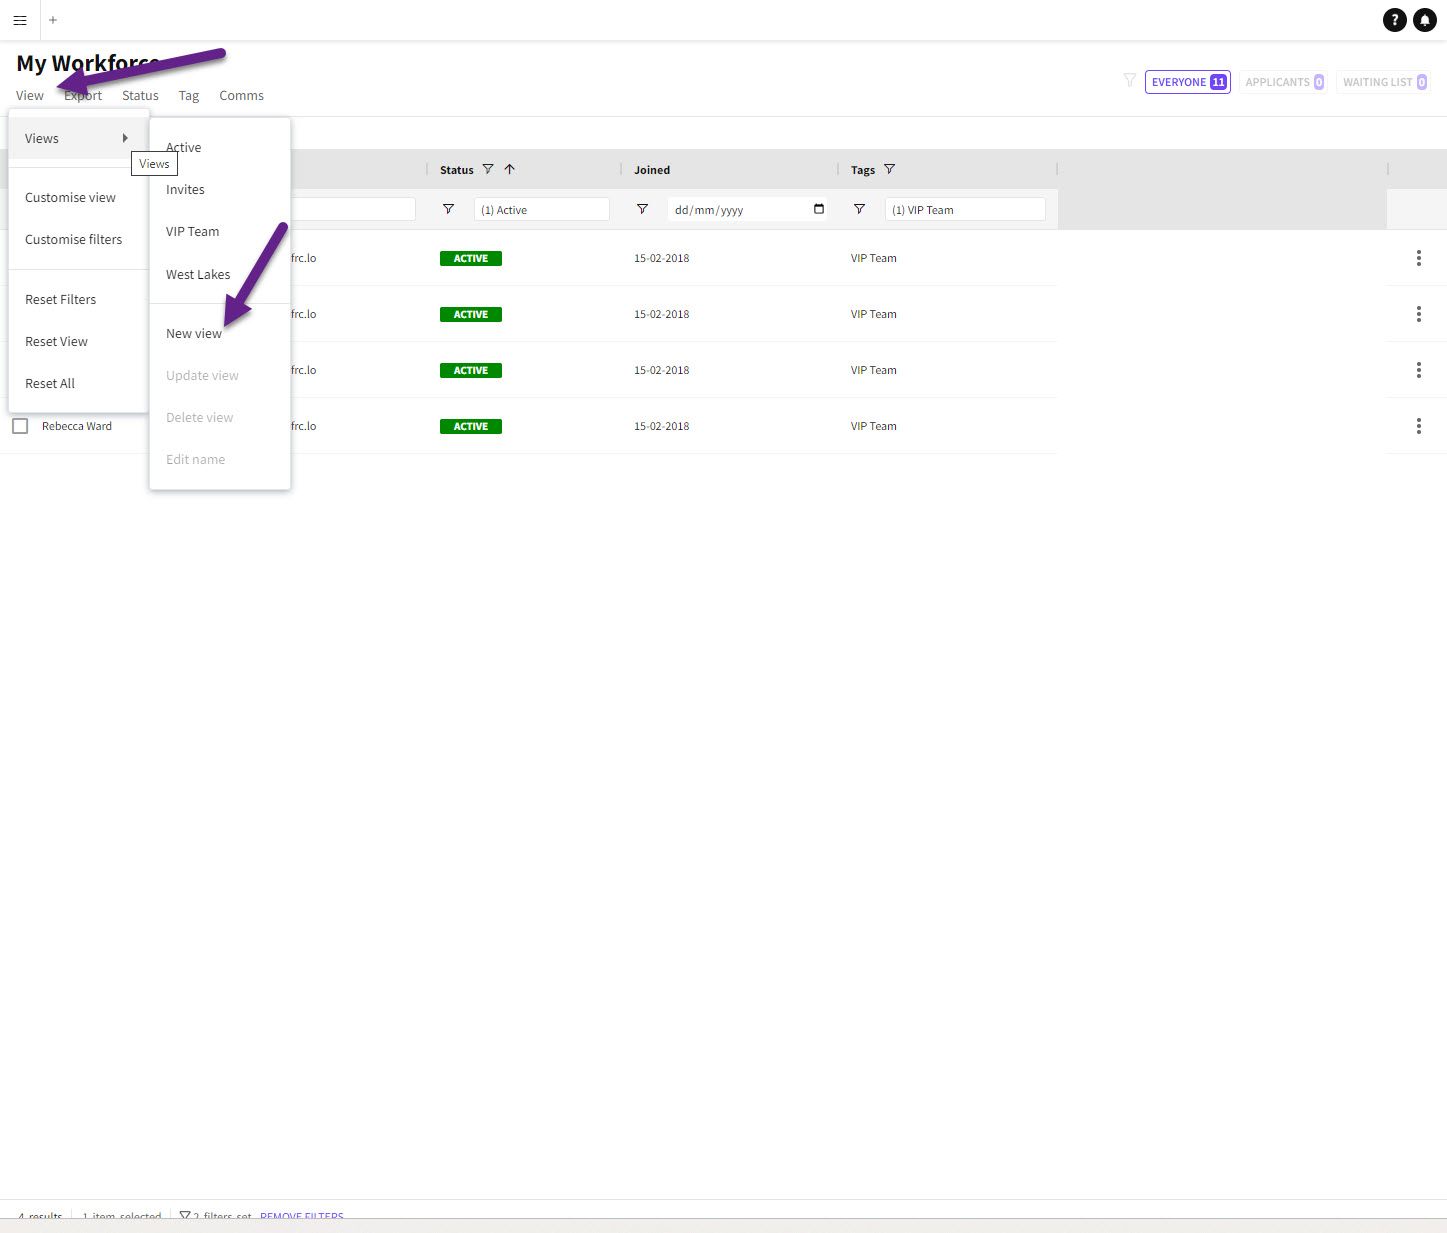
Create a View
To begin, you need to set the data and filters that are required for the view.
Select VIEW > CUSTOMISE VIEW
New View
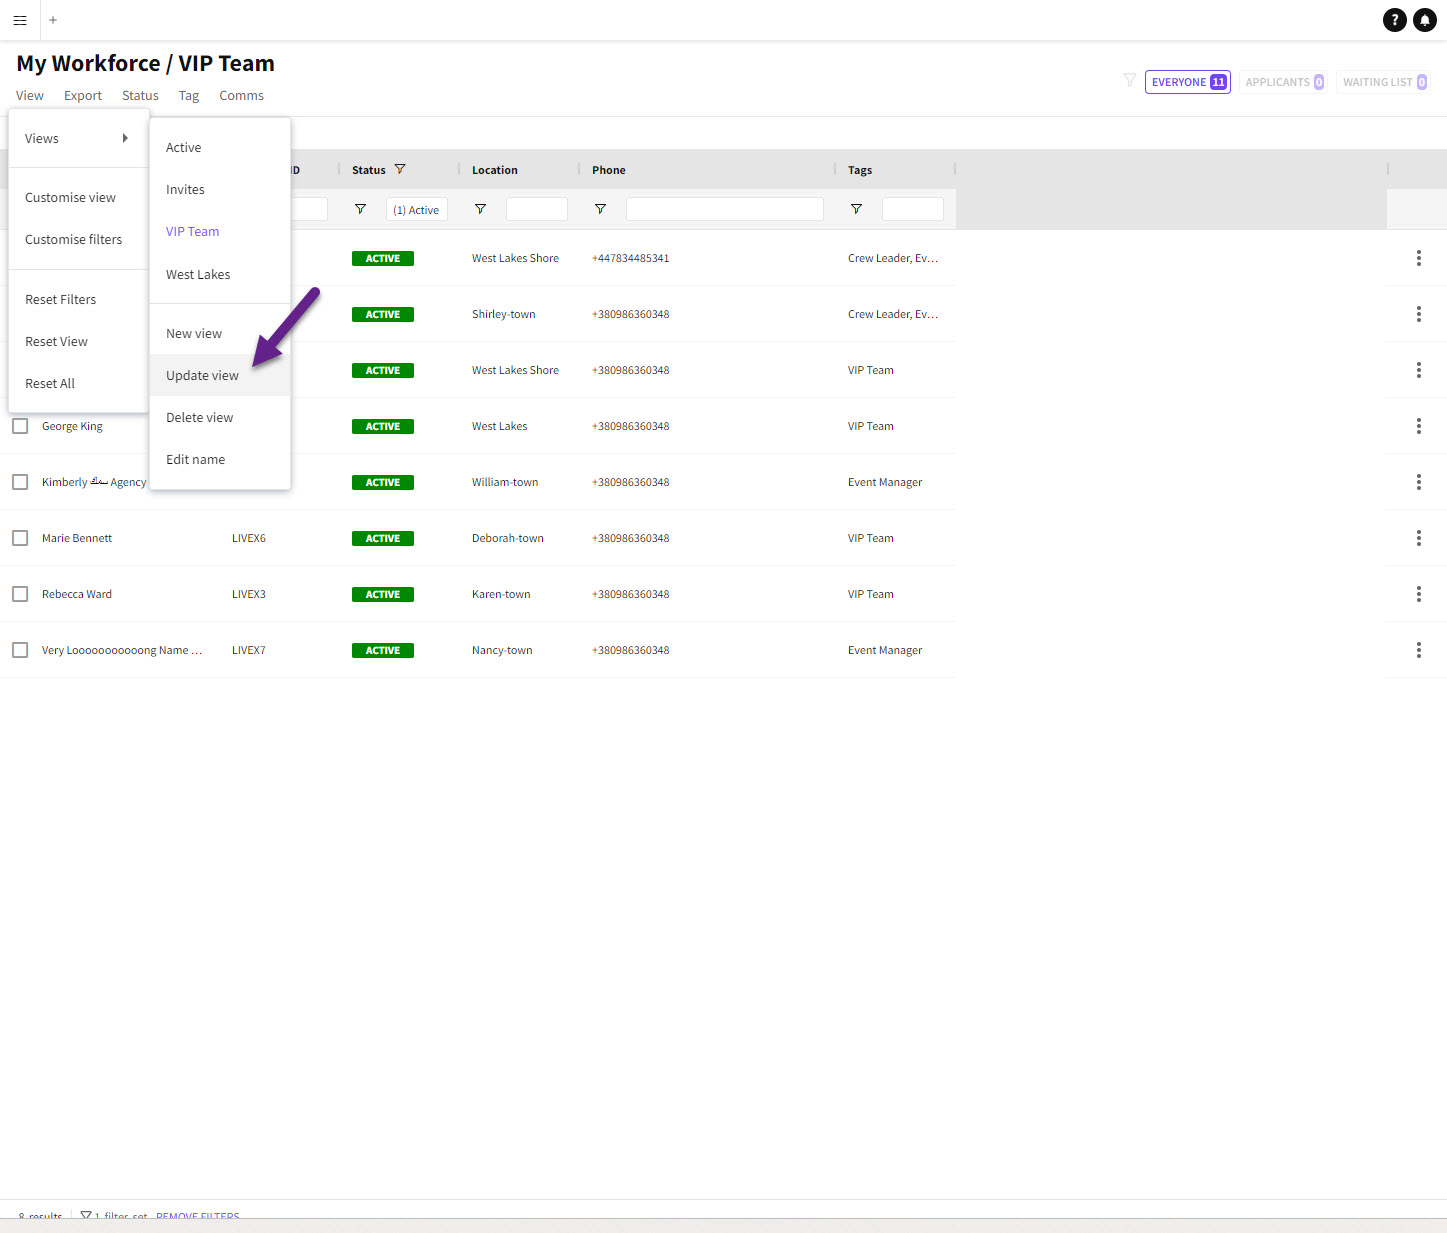
Once you have done that, go to the ' View ' tab and click on ' Views. From the dropdown menu, select the ' New View ' option.
Name View
Give your view a name that reflects its purpose.
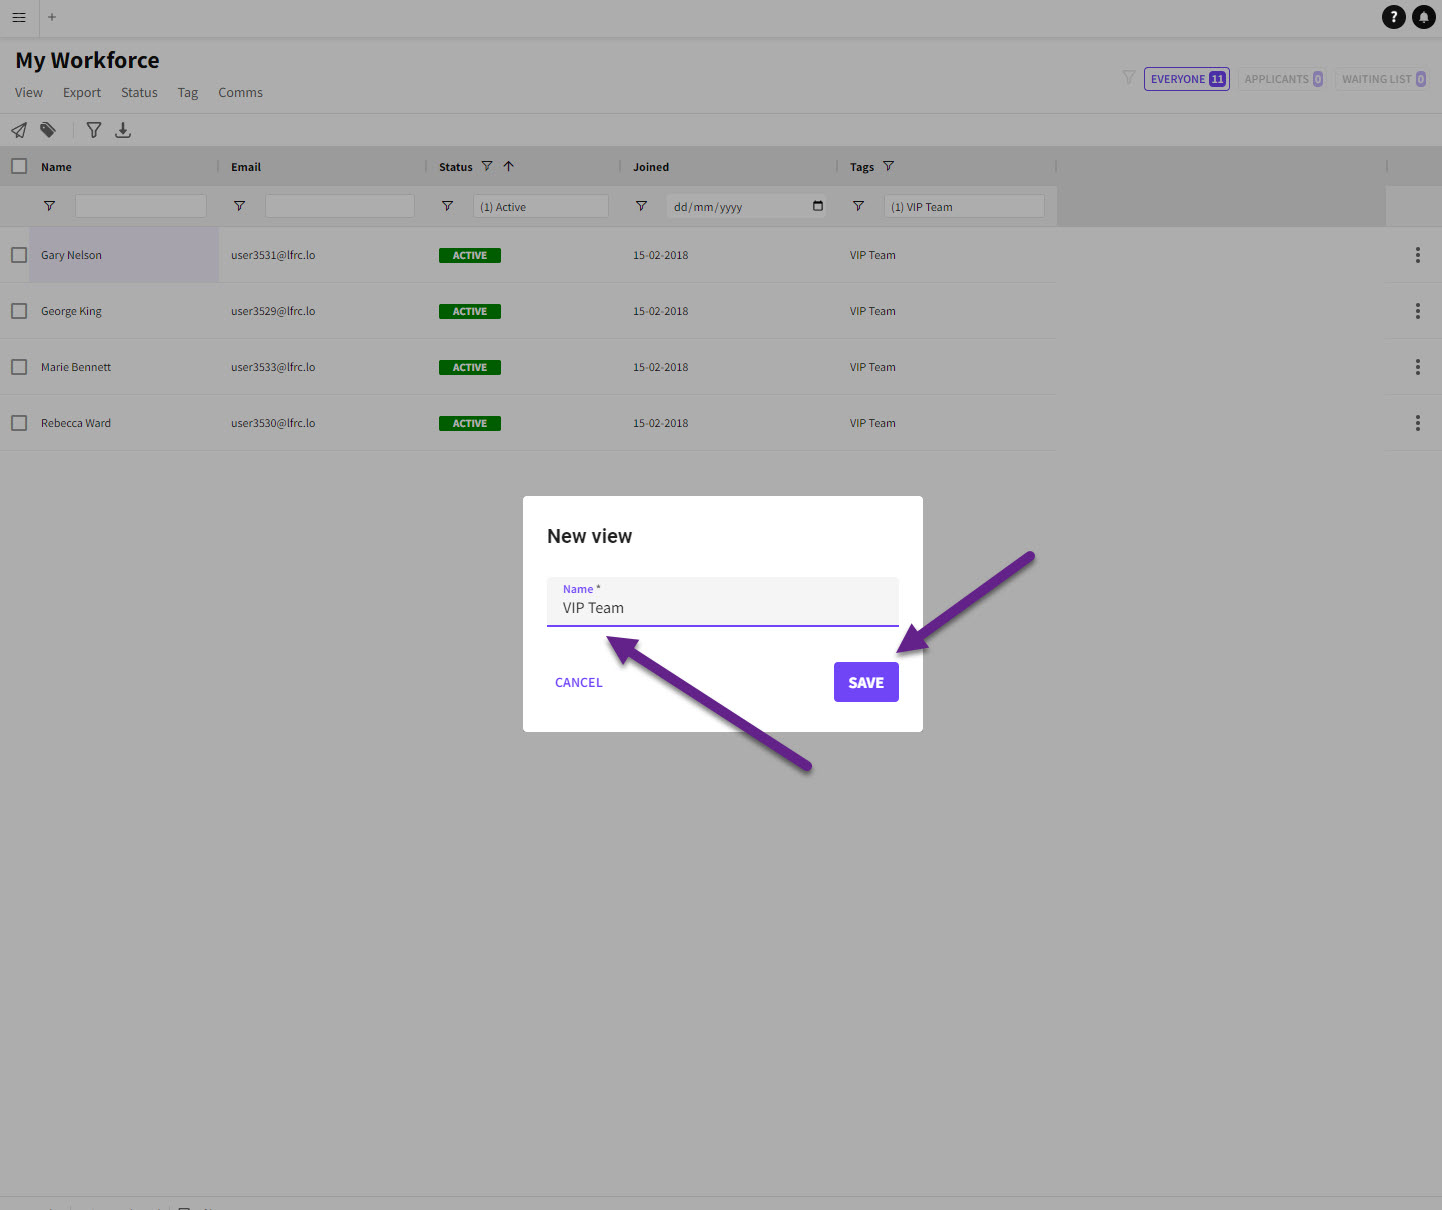
The view's name will appear at the top, making it easy to identify.
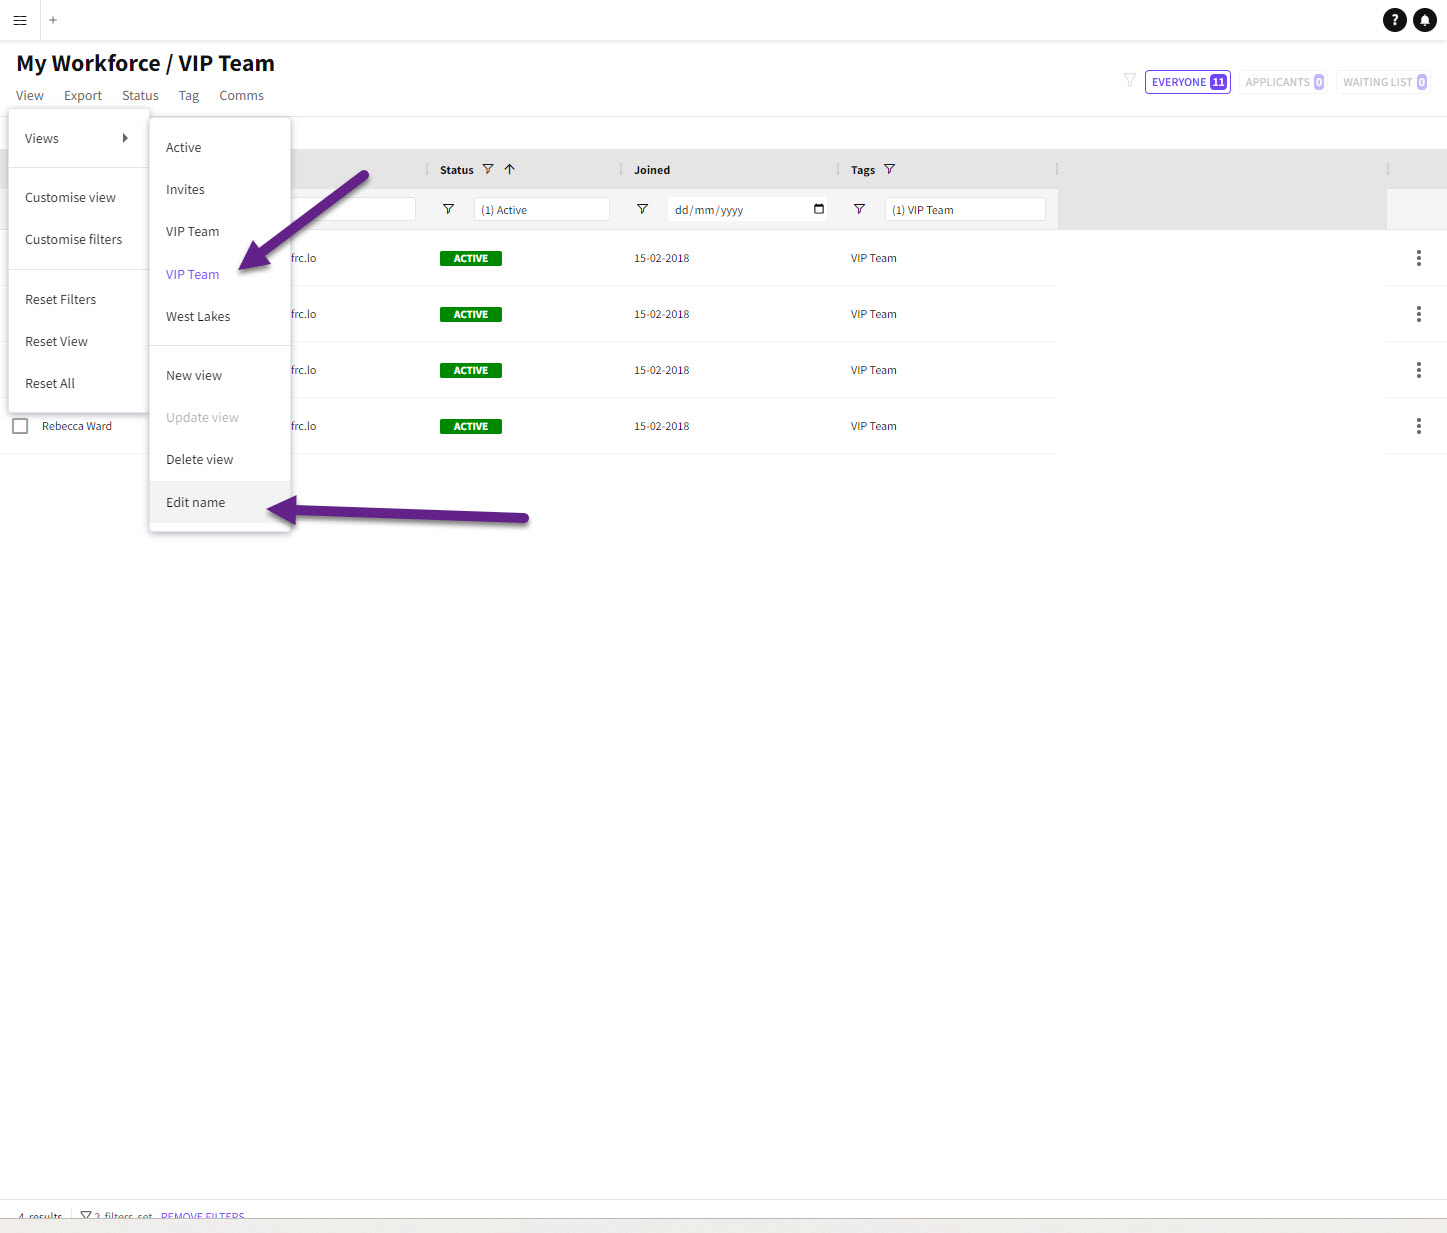
Edit Name
And if you ever need to change the name, simply click on the ' Edit Name ' option.
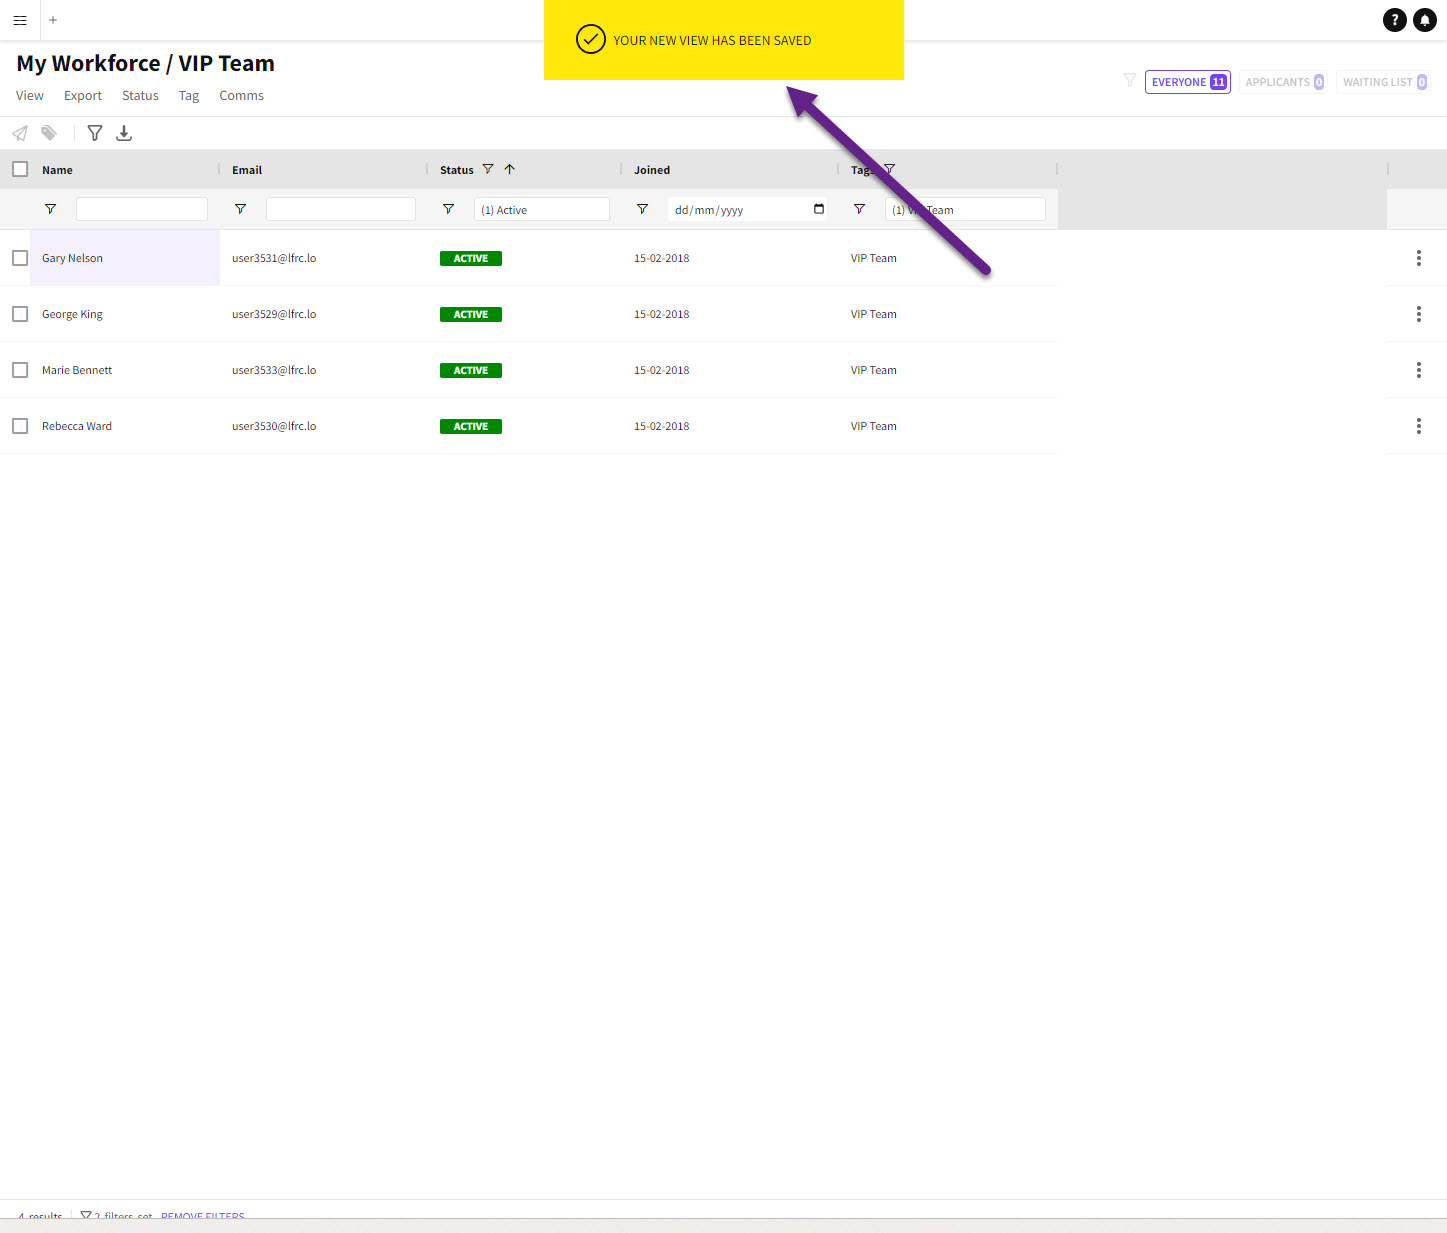
The updated name appears at the top.
Managing Views
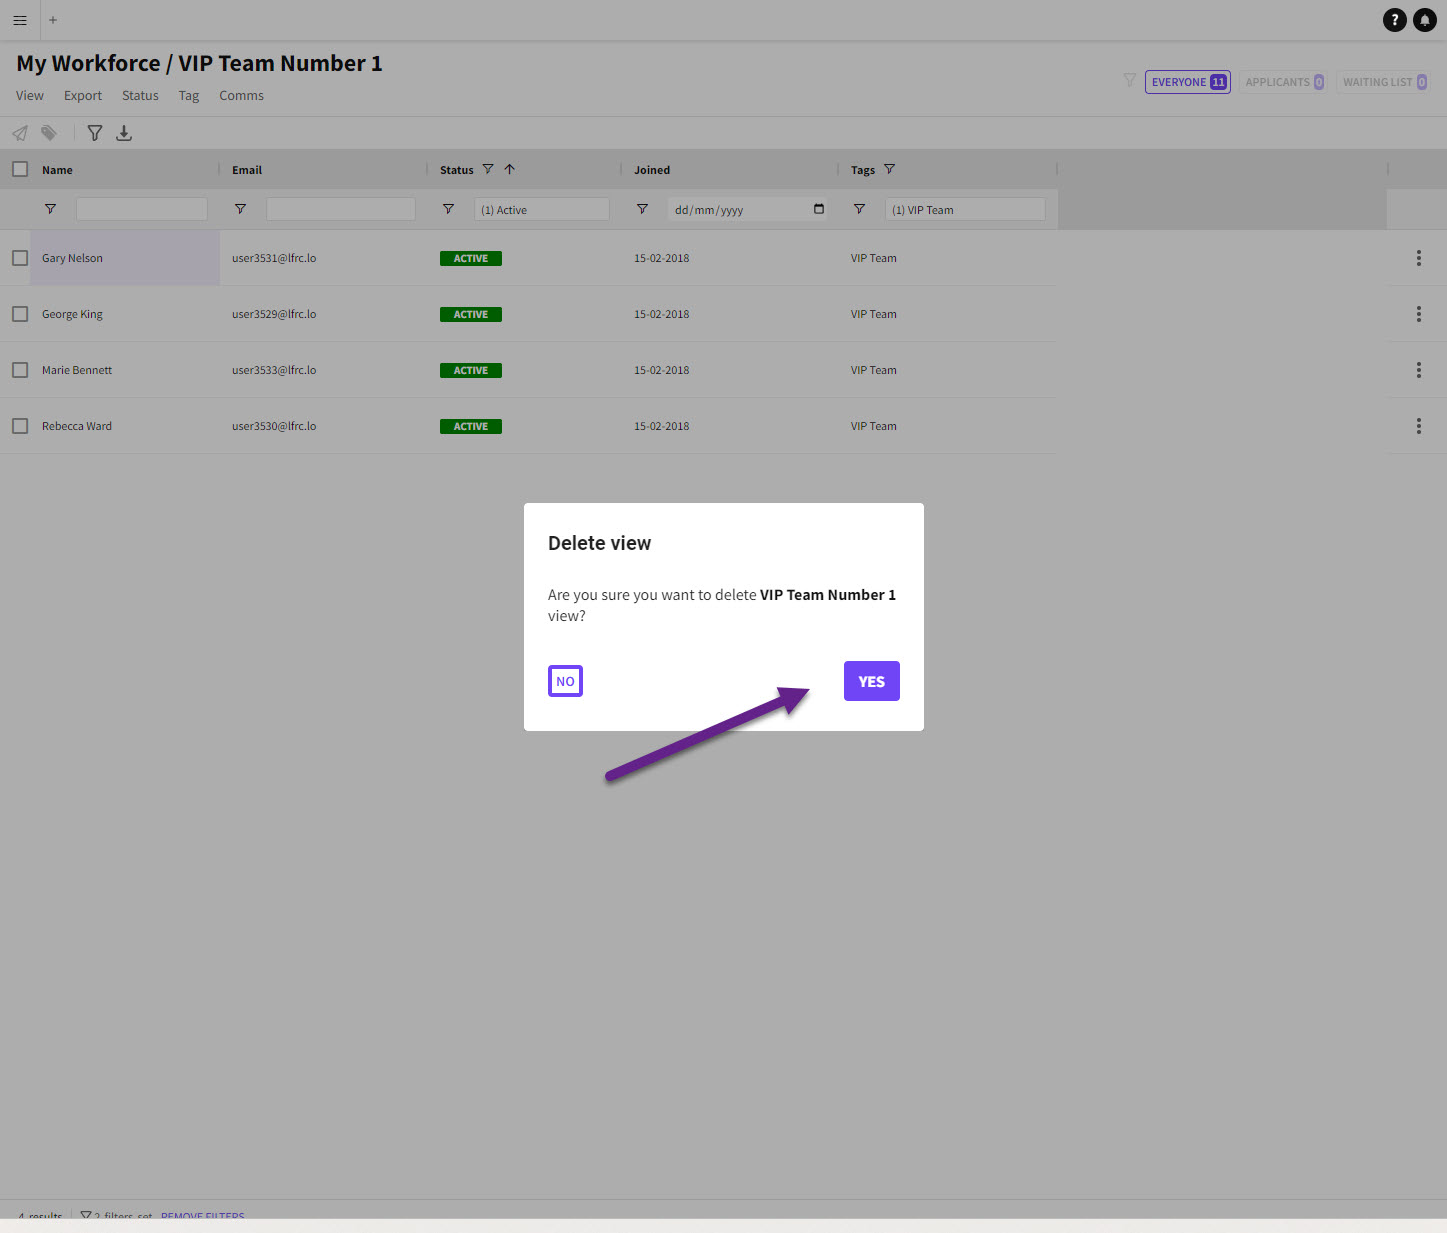
If you want to delete a view, select the ' Delete View ' option.
Delete View
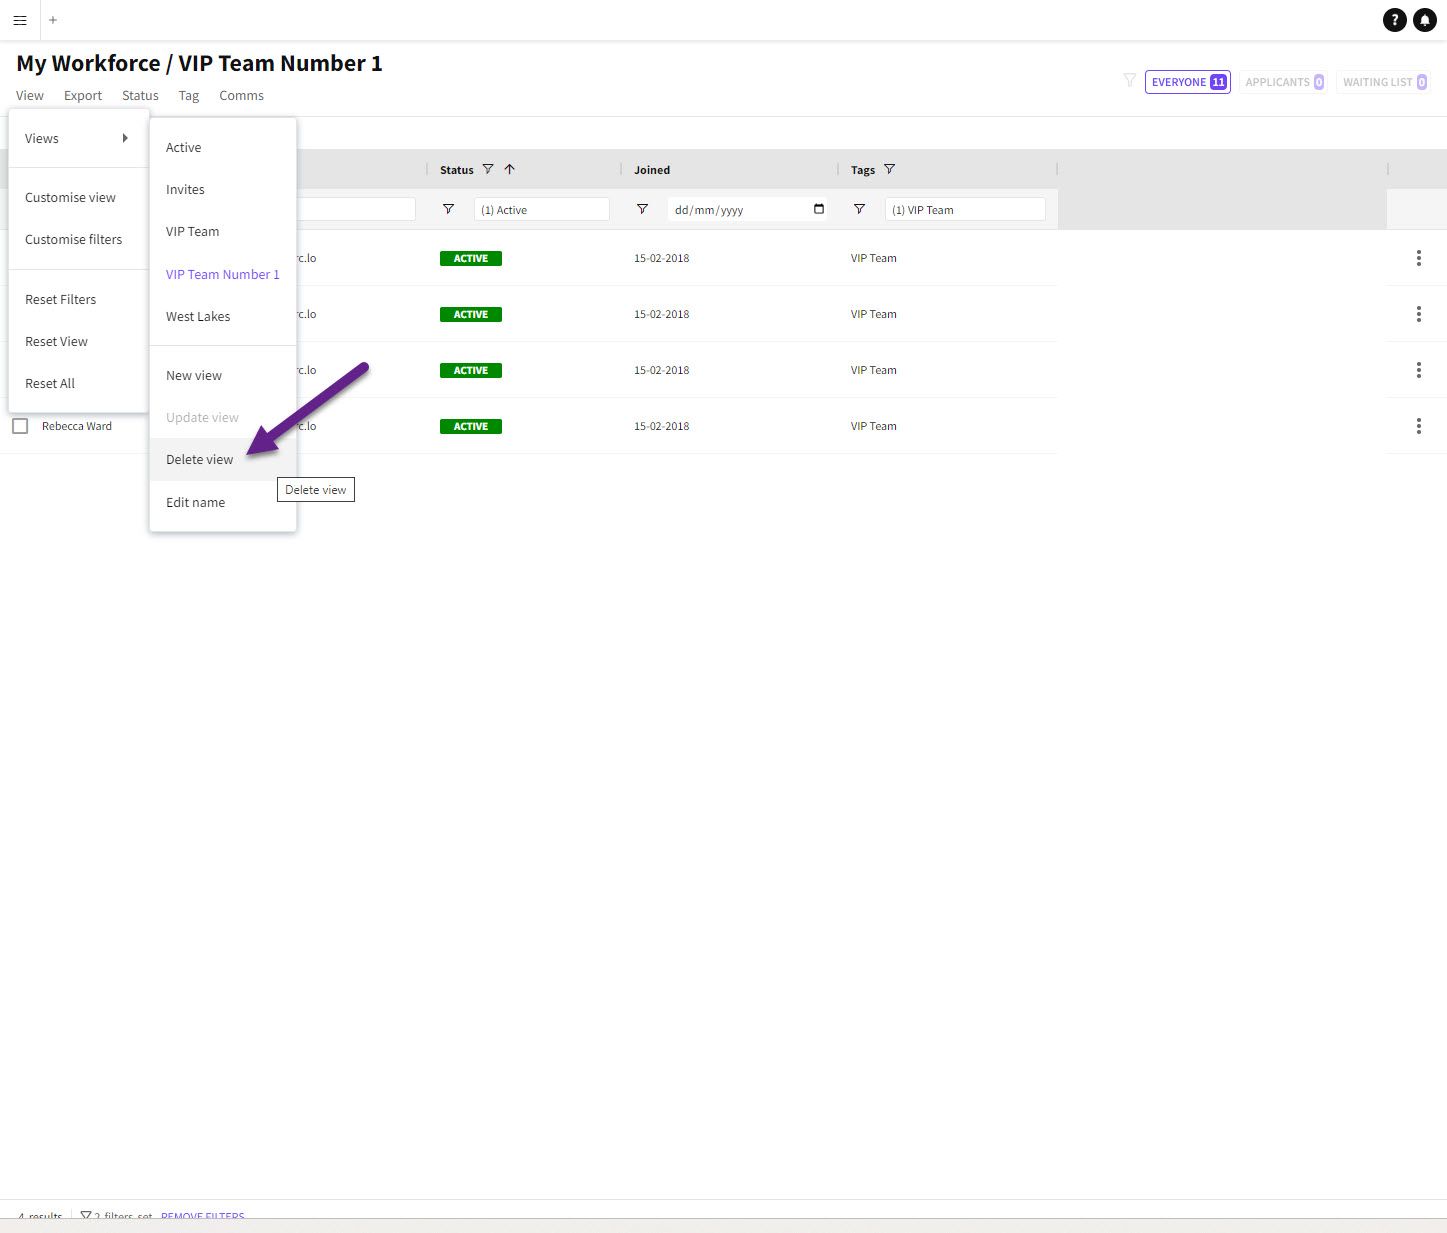
This action is not reversible, so double-check before confirming the deletion.
Update View
To update a saved view, make the necessary changes and select the ' Update View ' option. This will override the previously saved view with the updated one.
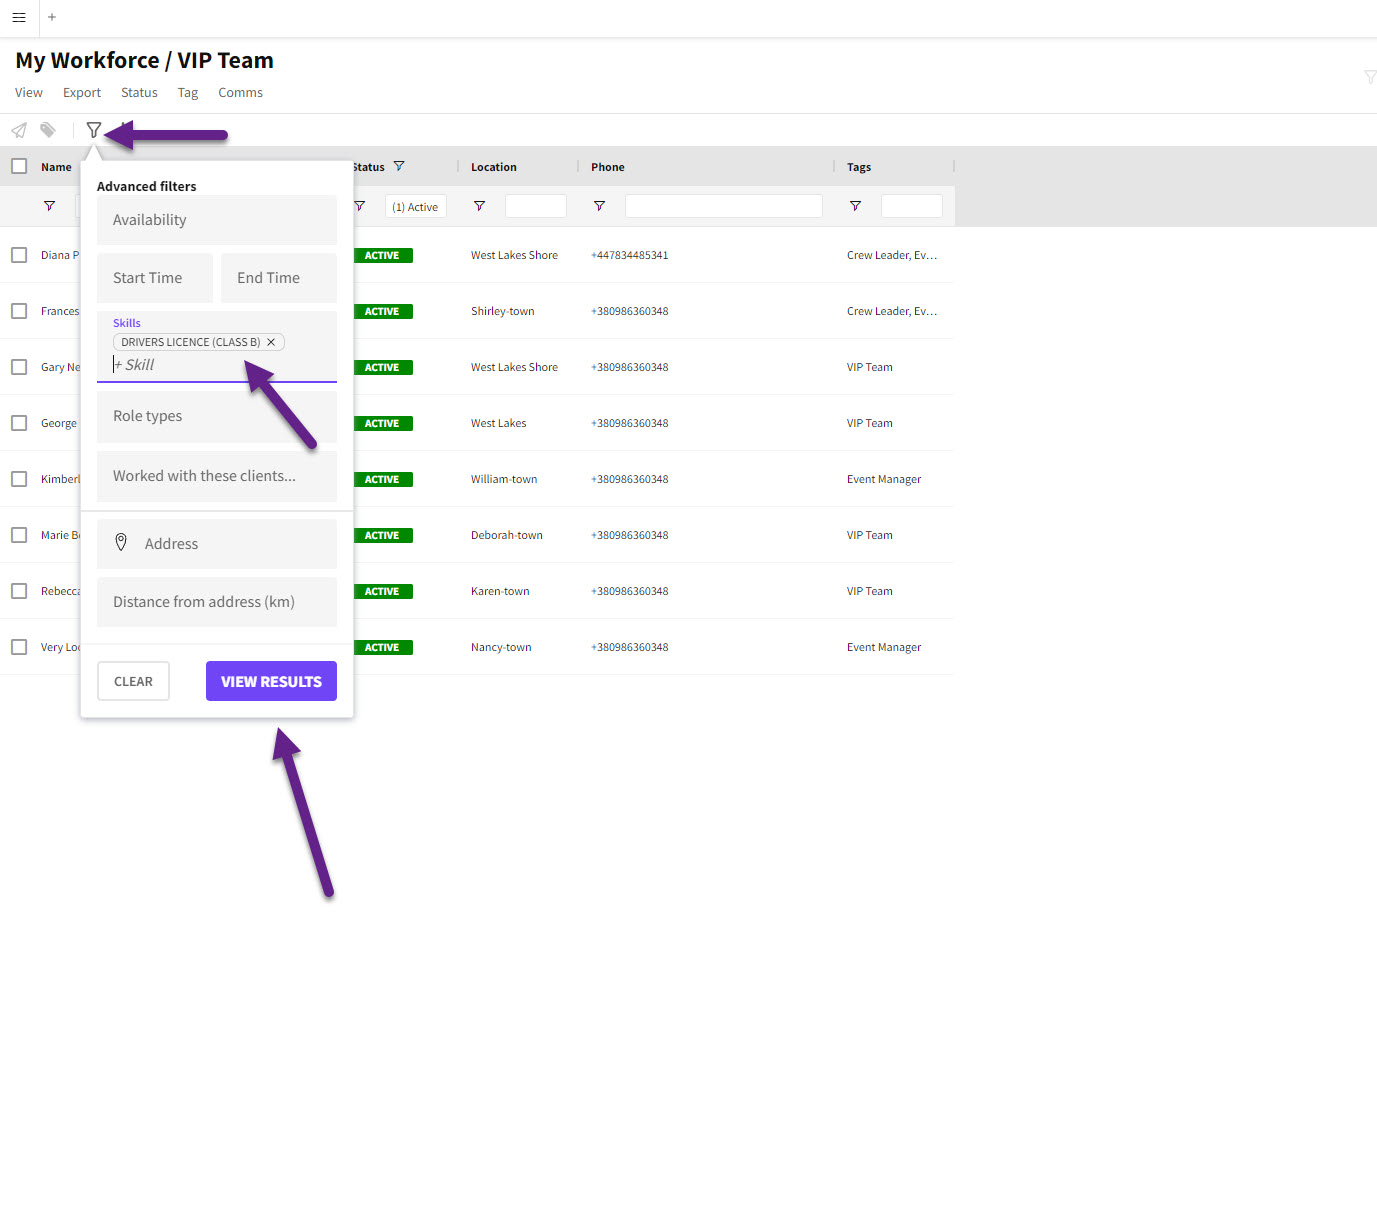
Advanced Filters
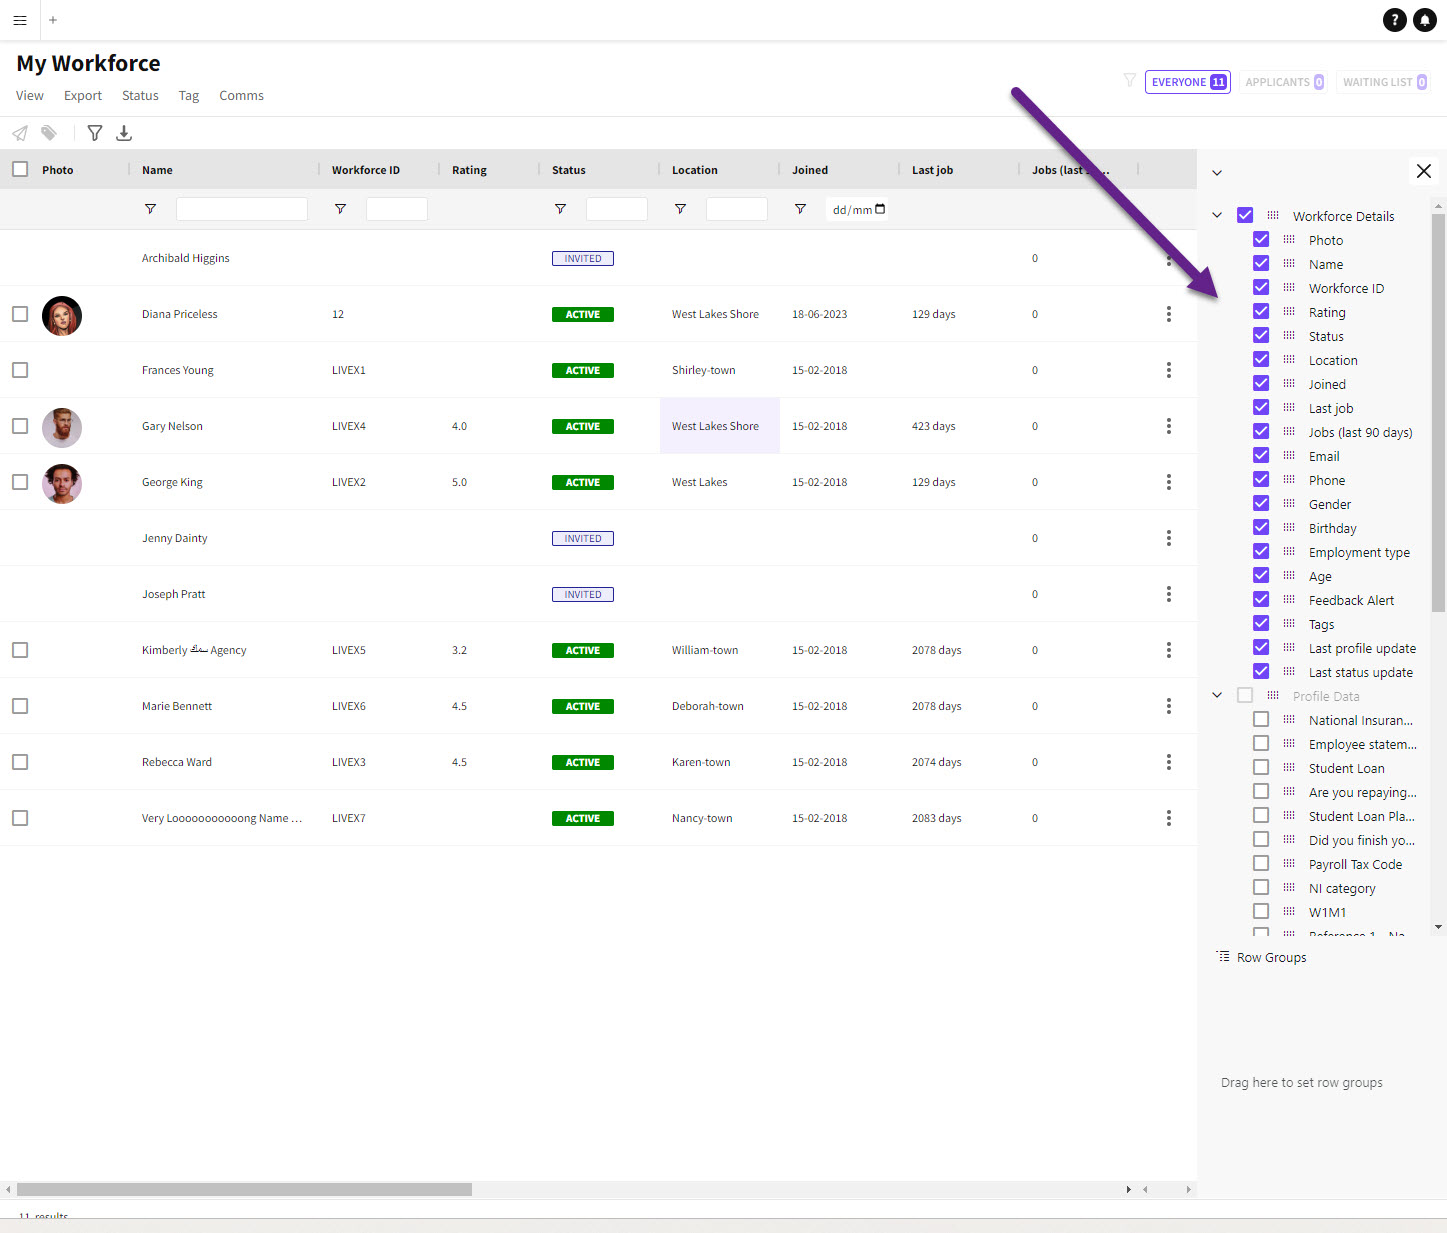
Any saved views on the workforce page will include advanced filters.
Summary
Saved views are a powerful tool in data analysis, allowing you to quickly switch between different table views and save time. By following a few simple steps, you can create, manage, and update your views effortlessly.