Admins can ensure that data is input in the correct format when Crew are adding information to their profile.
This process is known as DATA MASKING.
This process is currently only available to be used with the Short Answer field in the Profile Data page.
If data is input by Crew in the correct format at source, then Admins can save time by not having to chase up incorrect information.
This should reduce the time and resources spent on data cleaning and validation, leading to more accurate data analysis and decision-making.
PROFILES > DATA
Navigate to SETTINGS > PROFILES. Select the profile type, in this case we select employed Crew and click on the DATA tab.
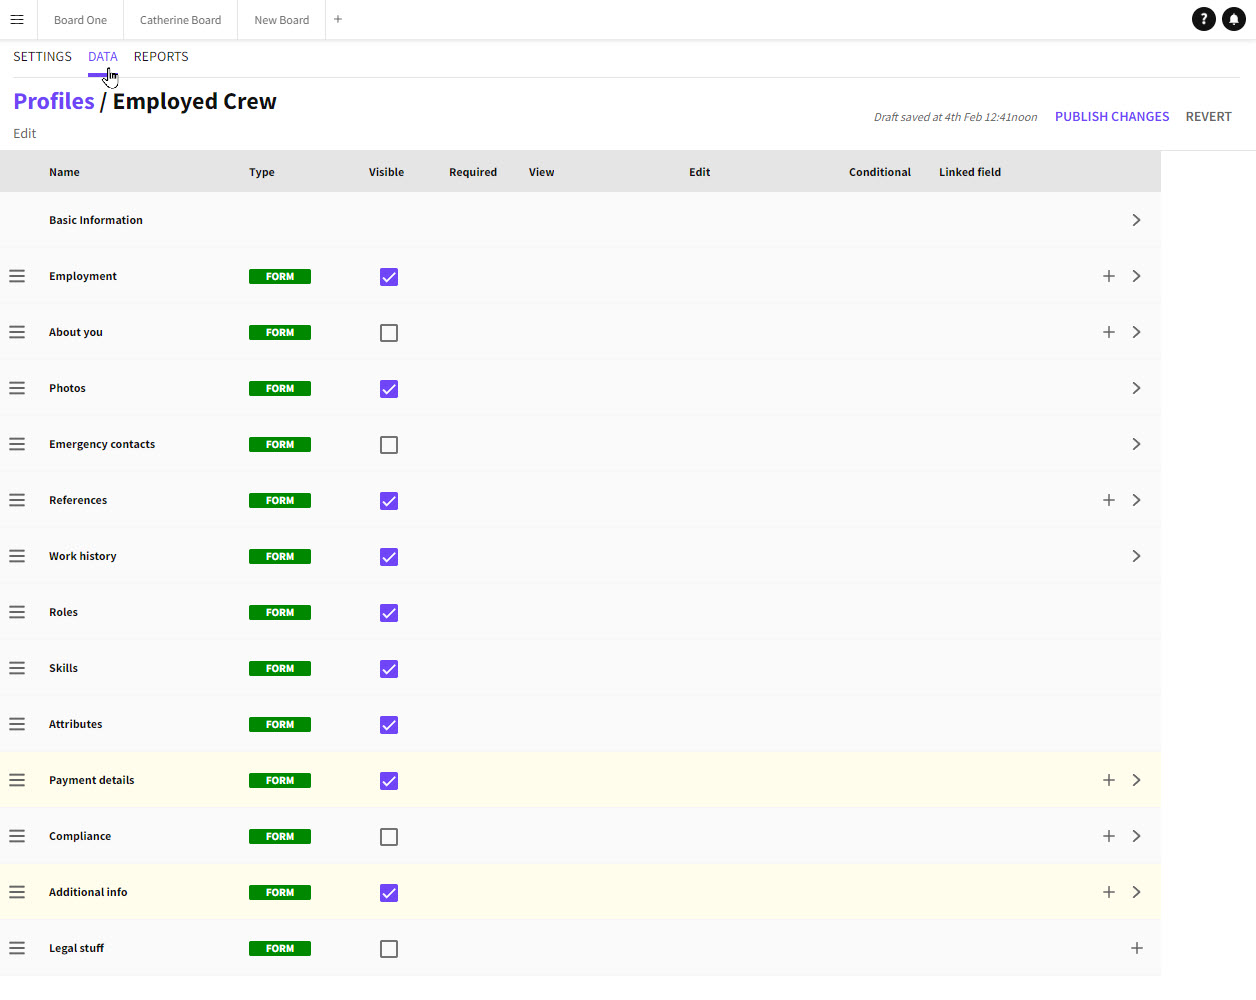
PROFILES > DATA
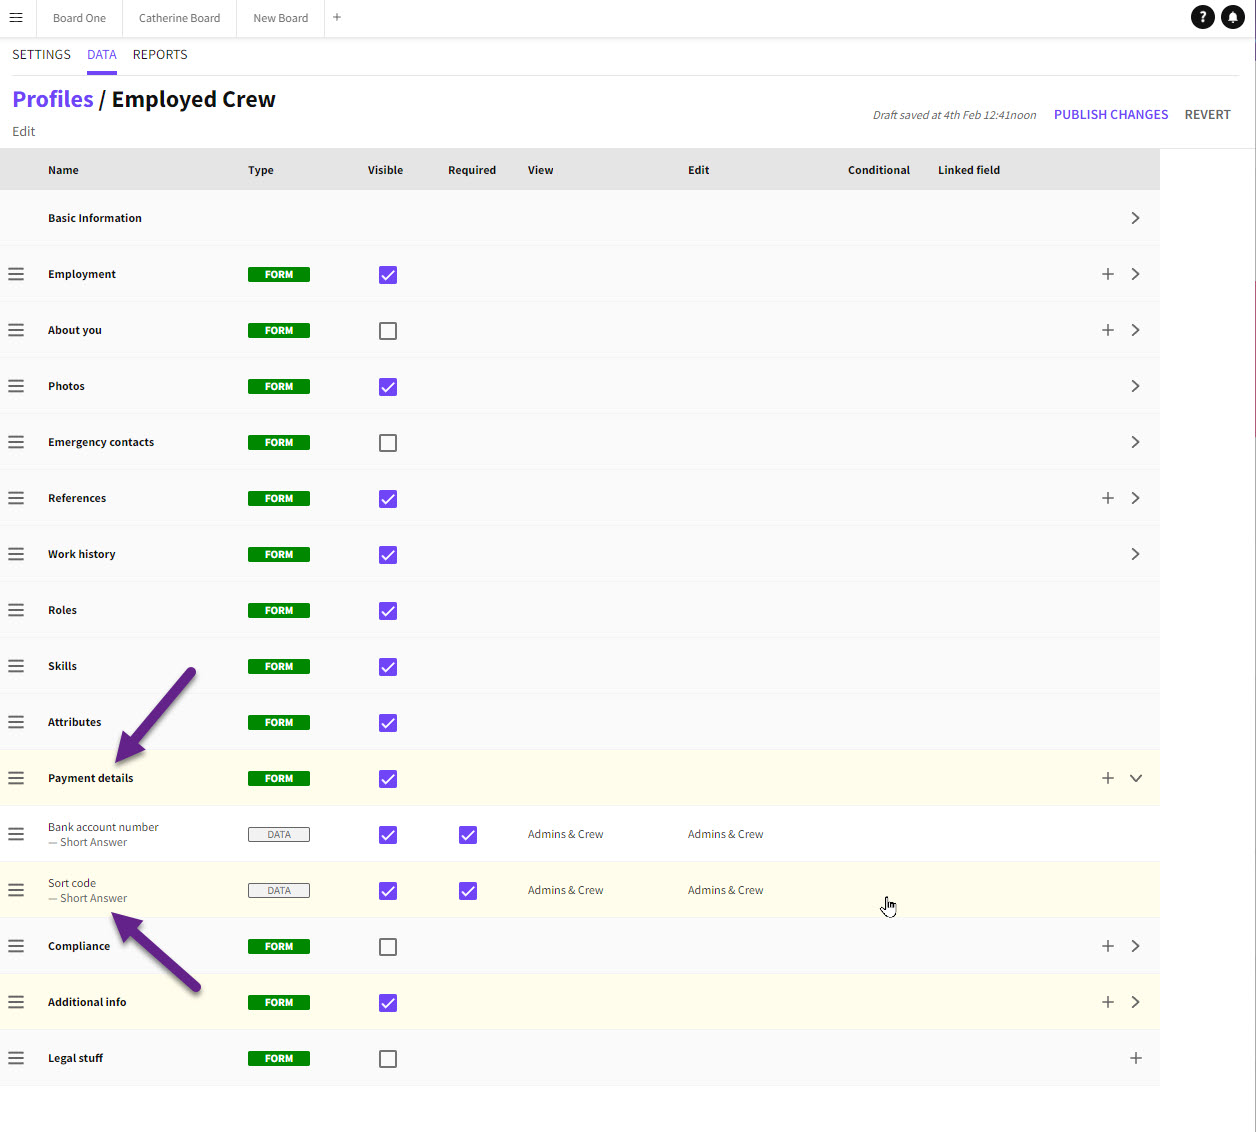
In this example Admin wants all new applicants to complete their sort code data in the correct format. The Admin is going to apply a mask to the Sort Code field in the Payment details section.
Short Answer
You will notice that the data type is Short Answer. Currently only Short answers can have a mask applied to them.
Short answer data field.
Admin clicks on the field and the Short answer popin opens.
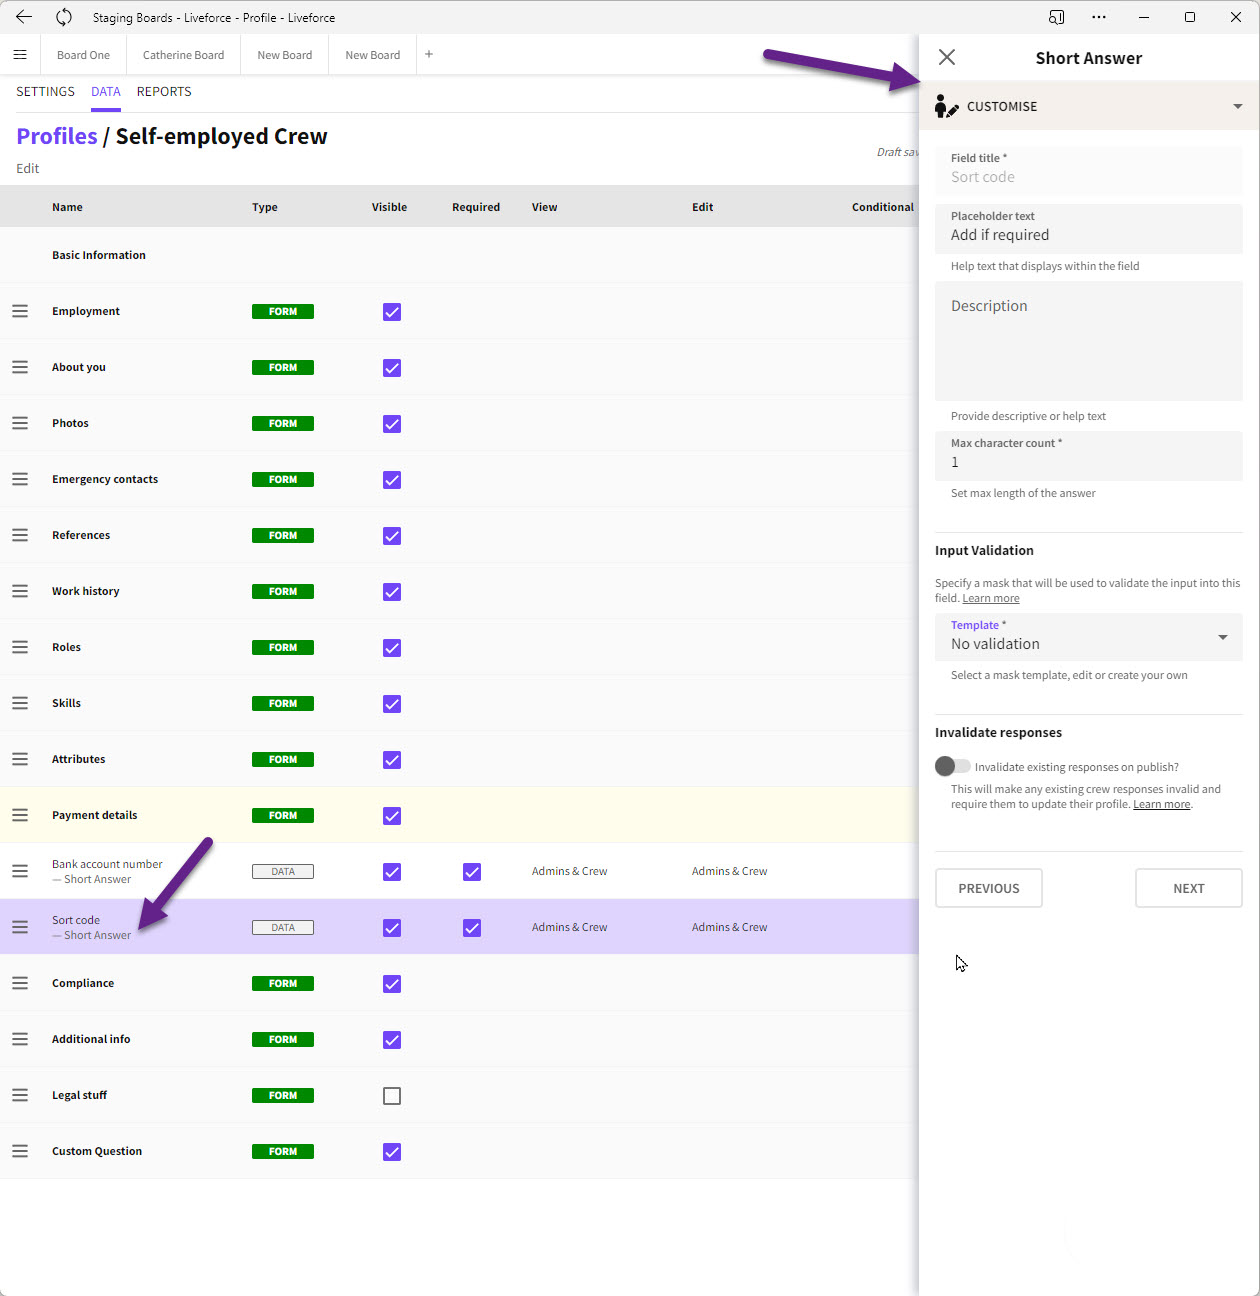
Short answer popin
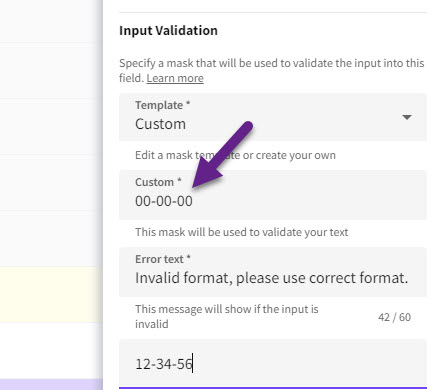
Input Validation
In the Input Validation section Admin selects CUSTOM from the dropdown and adds a format.
In the future mask templates will be added for regularly used formats like Sort codes etc.
Admin adds a format in this case 00-00-00. More detail on formats will be covered later in this article.
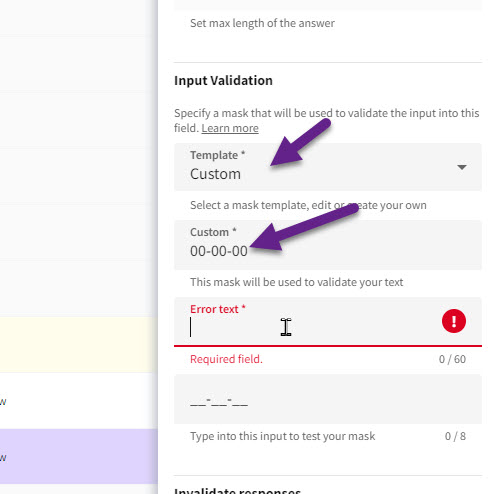
Adding a format.
Crew error message
At this stage Admin can add the error message that Crew will see if they enter their data in the incorrect format. In this case Admin adds ‘Please enter your data as follows 99-99-99’ It should be noted that Admin are limited to 60 characters for this message. This total includes spaces as characters, not just letters or numbers.
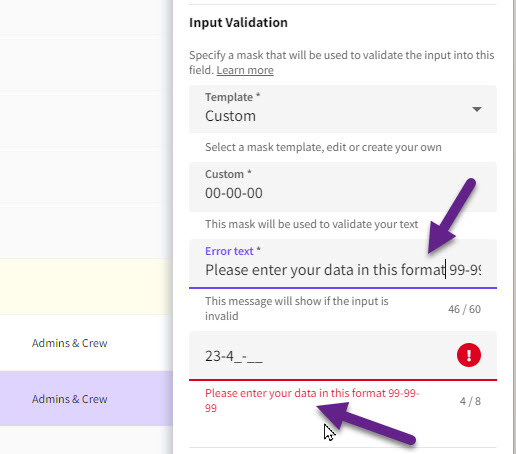
Error message.
This is how the error message looks in the app.
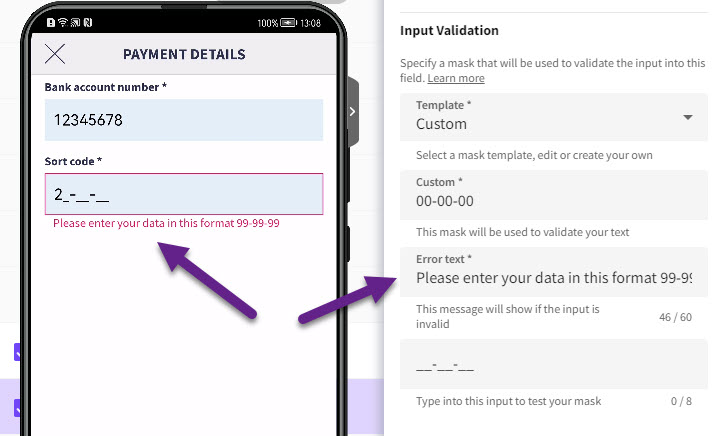
Error message in Crew app.
Testing
Before making a mask ‘live’ It is possible for Admins to test a MASK before publishing to the Crew profile data. This ensures that the mask has been set up correctly.
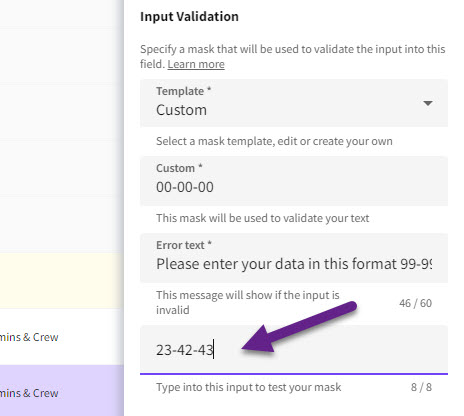
Testing a mask.
Invalidate Responses
They will leave the Invalidate Responses option unselected because they only want to apply this mask to new applicants. If they wanted all their current workforce to have to re-enter their sort codes then they would select this option.
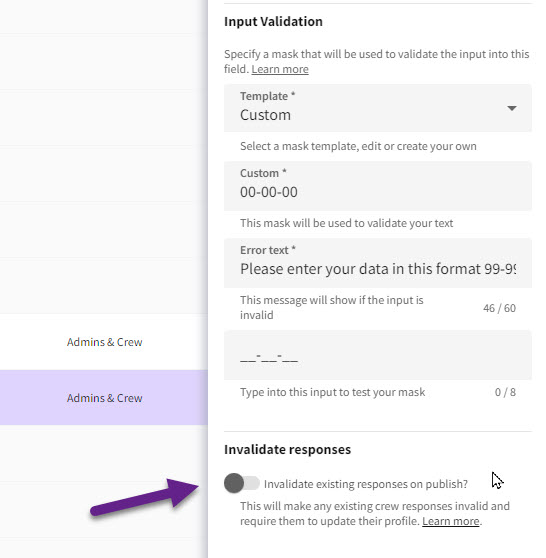
Invalidate responses option off.
Publish Changes
Close the popin and remember to publish changes to make the field live in the Crew app.
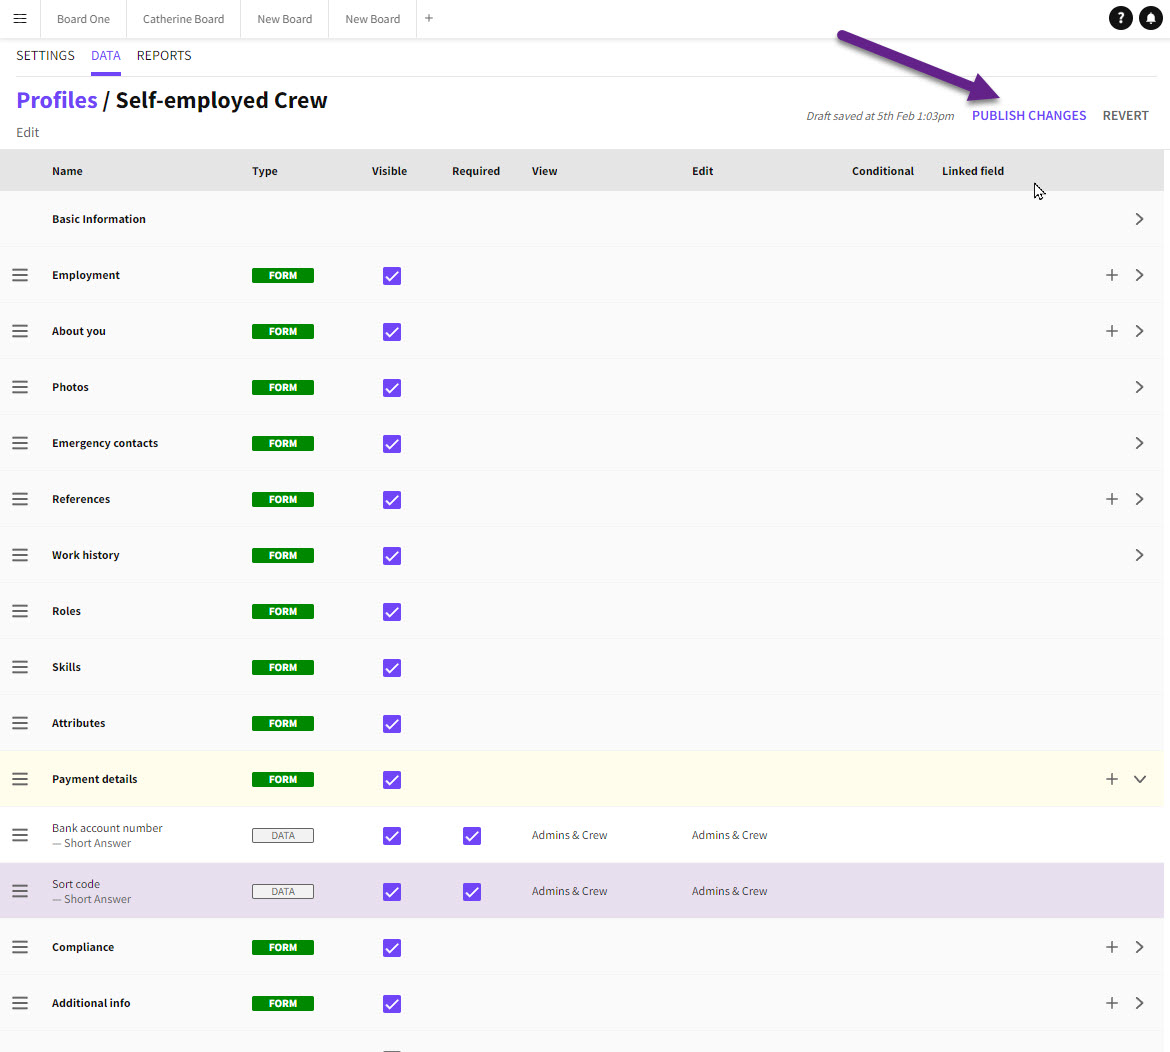
Publish changes.
Crew App
This is how it will look in the Crew app for new applicants before completion.
It is not possible for applicants to input data in an incorrect format.

Data input Crew app.
Only when the data is entered in the correct format will the SAVE button become active and applicants will be able to save their data.
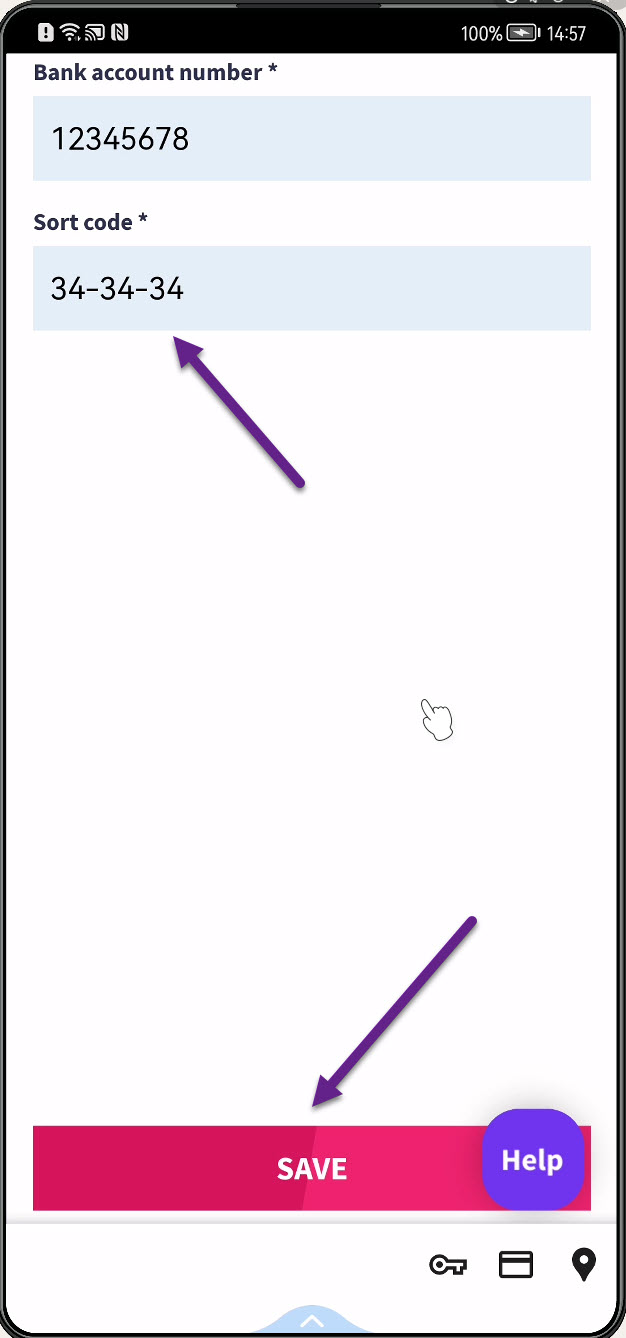
Active SAVE button.
Workforce Page
This field will also be available in the Crew profile in the Workforce page. The mask will also be applied here also.
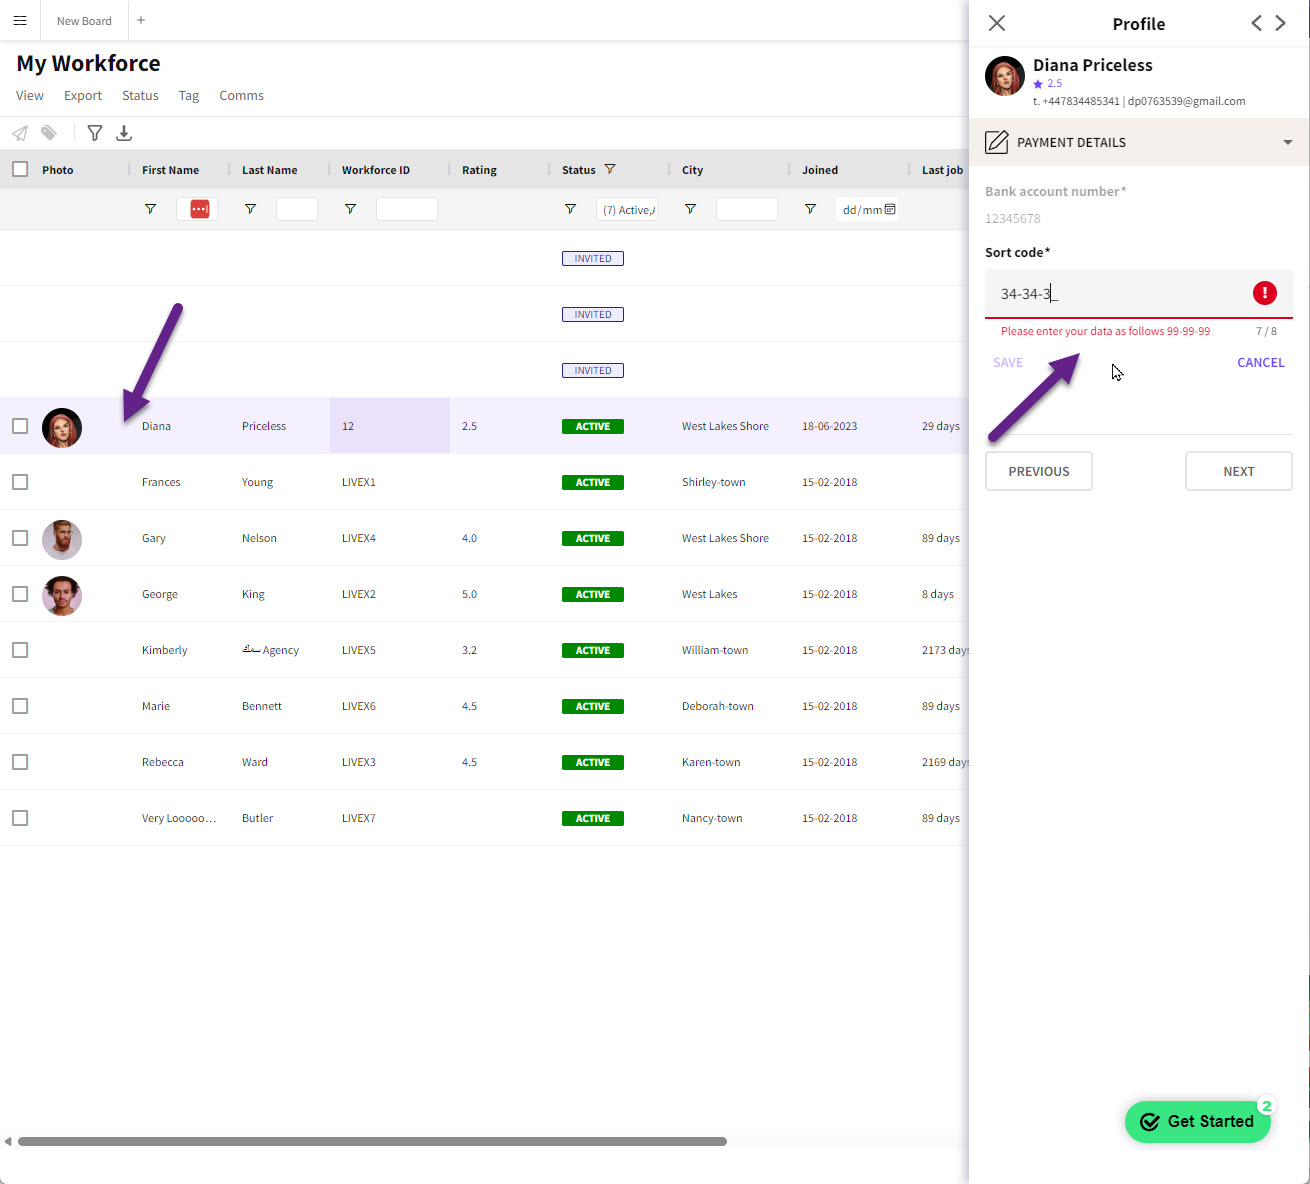
Crew profile - Workforce page.
Standard Codes
Here are a few other letters and digits that can be used to build your data masks.
To show these examples, let’s add a new short answer field, call it ID number.
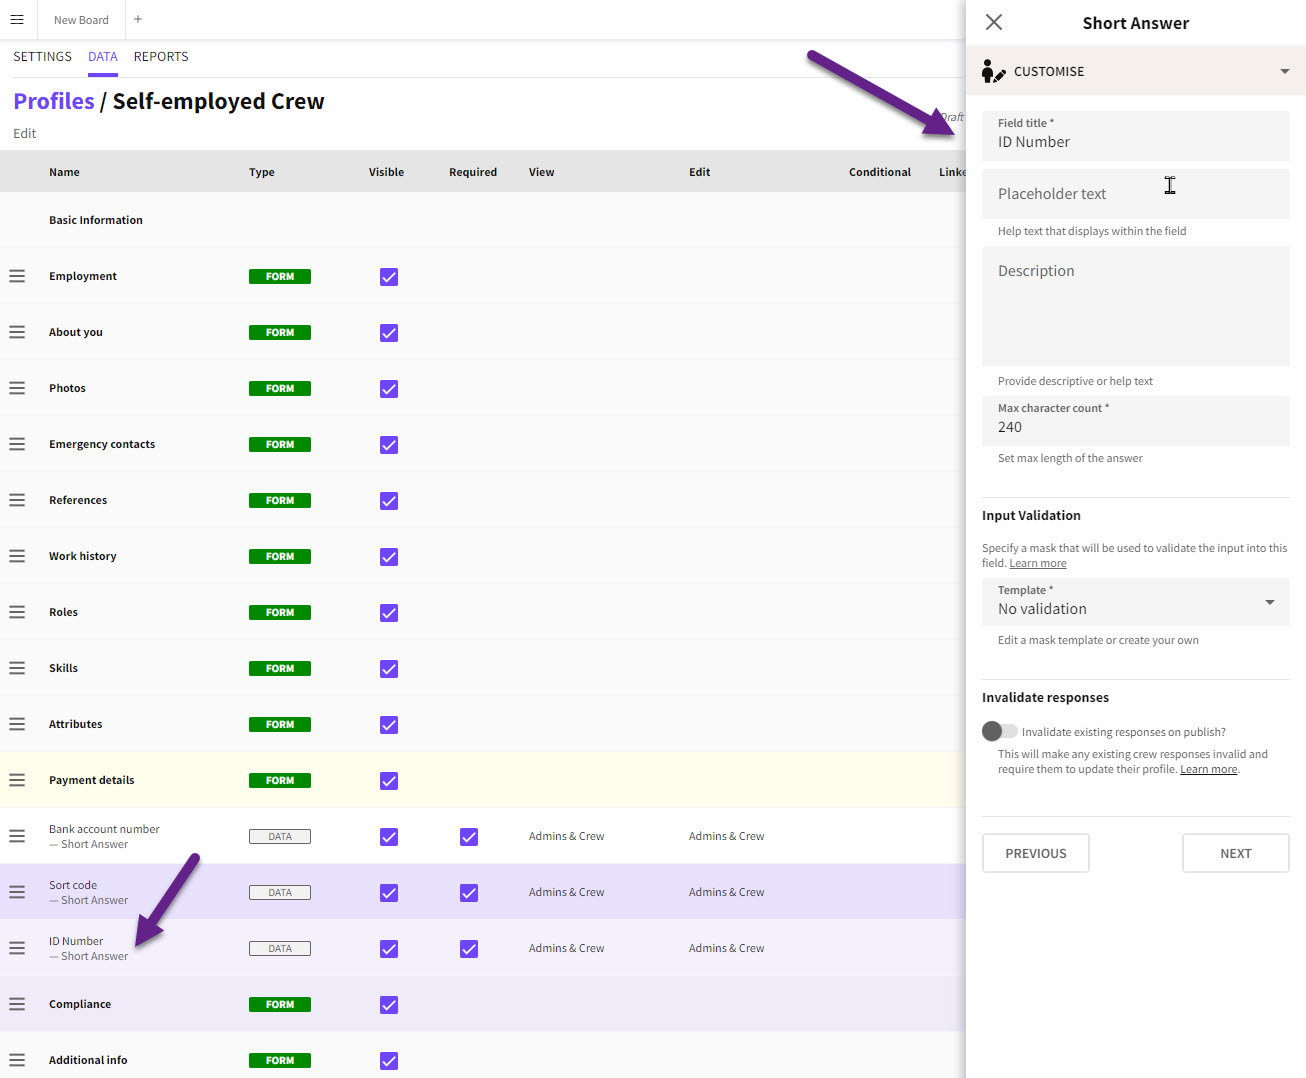
Adding a new short answer data field.
Here is a table with the Standard codes for letters and digits. These can be used when masking a data field.
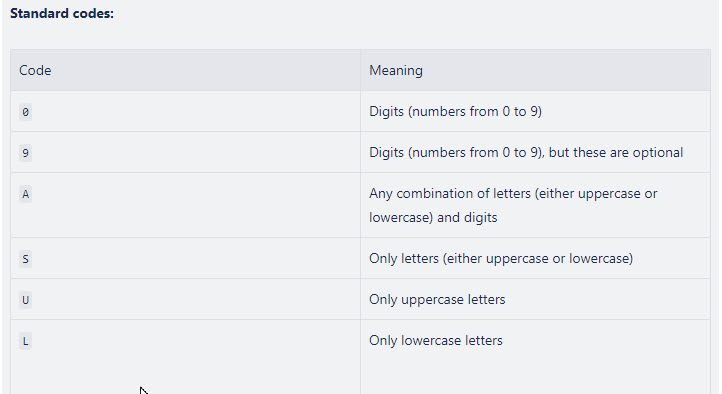
Standard codes.
This is how the standard code works. Let's start with an example of using A plus 9. A is any letter uppercase or lowercase plus any digits. 9 is for any number.
 Using A and 9 to mask input.
Now the example using S and U. S is for letters, both upper and lowercase. U is for only uppercase.
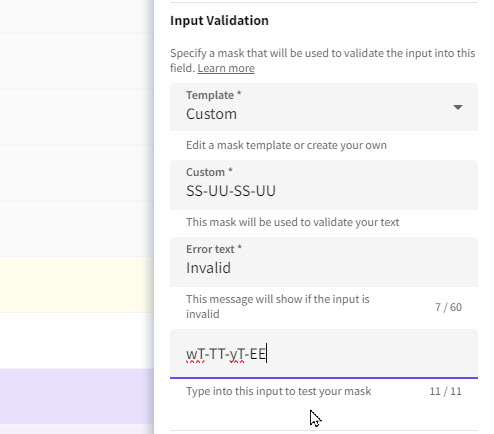
Using S and U to mask input.
Finally L. L is for lowercase entries only.
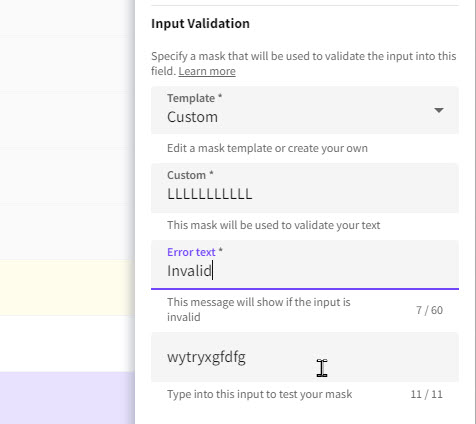
Using L for lowercase data entries.
Special Characters
Admin can also use this special Character table.
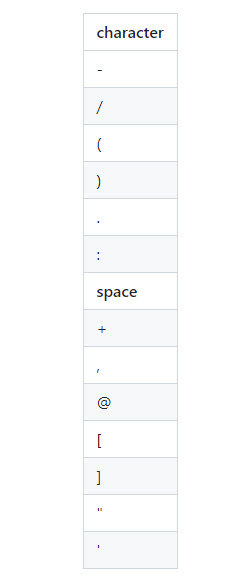
Special characters.
Some of these we have used already in our examples, like the hyphen we used in sort code masking.
Using the hyphen special character -.